Fiberglass
User guide
How to plant correctly in your pots.
To keep your pot for years and enjoy it in perfect condition, just follow a few simple rules.
Pots for outdoor use
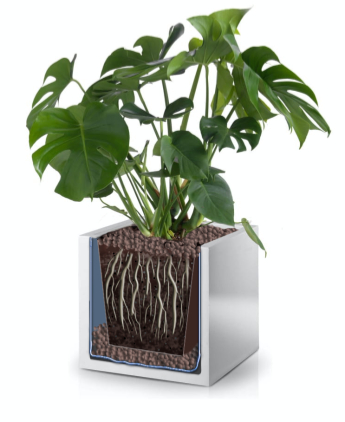
Direct planting
1.Drill drainage holes in the specially prepared recesses on the bottom of the pot.
Drill slowly, without pressing down, using a bit of approx. 8 mm.
2.Line the inside with the supplied garden membrane or liquid membrane. The drainage hole must stay clear, so pierce the membrane in the right place.
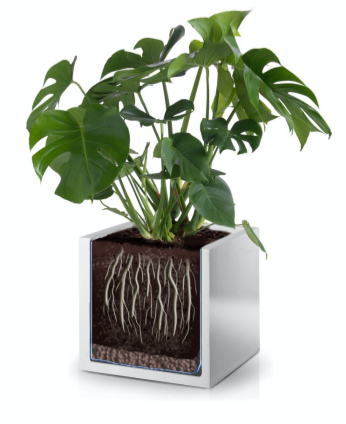
3.Place expanded clay aggregate at the bottom of the pot.
4.Pour soil over the layer of expanded clay aggregate
and plant your plant in it.
Indirect planting – using an insert
1.If you'd rather not have holes in the pot, you can plant into the original nursery pot or any other plastic insert.
2.Line the inside of the pot with the supplied garden membrane or liquid membrane.
3.Pour expanded clay aggregate into the bottom of the pot.
4.Then place the plant, still in its insert, inside.
5.To hide the insert, cover it with expanded clay aggregate (recommended) or soil.
Pots for indoor use
Direct planting
1.Line the inside of the pot with the supplied garden membrane or liquid membrane.
2.Pour a layer of expanded clay aggregate into the bottom of the pot.
3.Then plant your plant and cover it with soil.
Indirect planting – using an insert
1.Line the inside of the pot with the supplied garden membrane or liquid membrane.
2.Pour expanded clay aggregate into the bottom of the pot.
3.Then place the plant, still in its insert, inside.
4.To hide the insert, cover it with expanded clay aggregate (recommended) or soil.
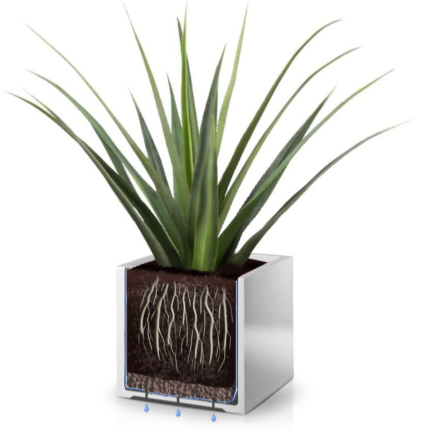
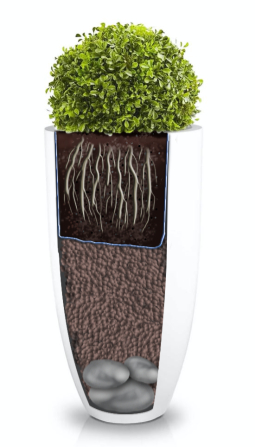
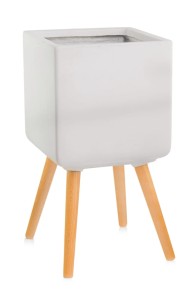
Planting in a tall pot
When planting in a tall pot, don't line the entire inside with membrane — only the upper part, to about 40 cm from the top edge, so that excess water doesn't drain all the way to the bottom.
In this case you can fill the bottom of the pot with, for example, polystyrene, polyurethane foam or expanded clay aggregate, and only then lay the membrane over that prepared layer.
Note! To keep the pot stable, it's worth
adding some weight to the bottom.
Using membrane
Line the inside of the pot thoroughly with the garden membrane included in the set. Tuck any excess material under the rim so it stays hidden, or trim it off.
Using liquid membrane
You can also protect the inside of the pot with what's known as liquid membrane. This is a substance designed to create a waterproof barrier. Apply it with a brush. It's best to build the barrier up in two coats. Once the first has dried, apply the second at right angles to it.
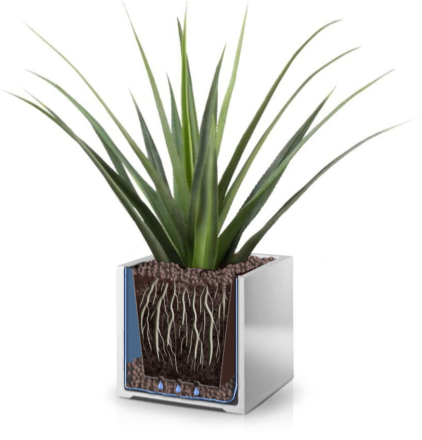
Using expanded clay aggregate
Horticultural expanded clay aggregate is a porous granular material with a high capacity for absorbing moisture. Spread across the bottom of the pot, it creates a reservoir of moisture and stops the plant's roots from staying in constant contact with excess water. It acts as drainage. Expanded clay aggregate is chemically inert — it doesn't change the pH of the substrate and is also resistant to any mould or fungal growth, which lowers the risk of plant infections.
Expanded clay aggregate
is available
in our shop
in packs of
5 l / 10 l / 25 l / 50 l
Insulating the pot with polystyrene
To protect plant root systems from freezing in winter, it's worth insulating pots that stay outdoors through the cold months. The best approach is to line the inner walls with a layer of insulation about 2–3 cm thick.
Moving the pot
When moving a planted pot, never lift it by the rim.
Watering
With indirect planting, remember to water the spot where
the part of the substrate inside the insert is located.
Keeping it clean
Clean with clean water (or glass cleaner if needed) using a soft sponge or cloth. Do not use solvents or citrus-based cleaners.

Failure to follow the guidelines above counts as misuse and voids the right to any complaints or claims.
Produkty polecane


#POLNIX
Zainspiruj się!
Zobacz nasze donice w pięknych aranżacjach na Instagramie.
Z nami możesz przesadzić!